
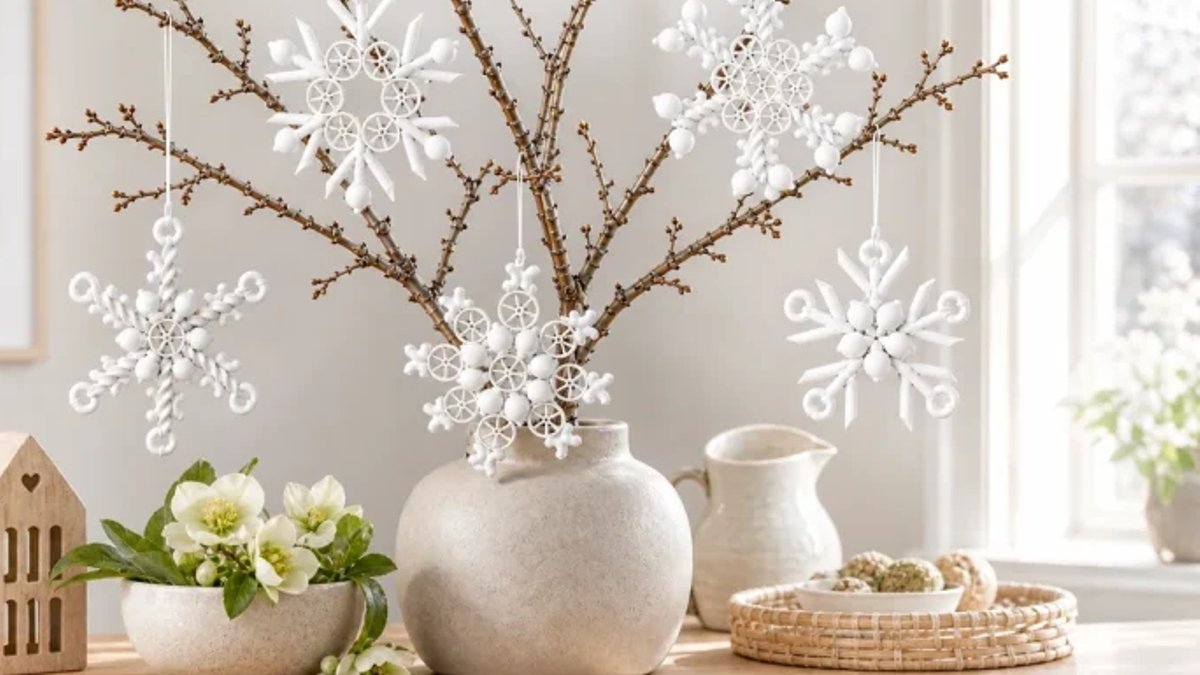
A handful of pasta shapes, a coat of white paint, and a dash of creativity can transform your pantry staples into delicate winter decor. Wagon wheel pasta, penne, and shells become the building blocks for detailed snowflakes that look surprisingly refined once painted.
Hung on bare branches, suspended in a window, or nestled among votives, these DIY creations fit seamlessly into a minimalist Scandinavian aesthetic. The best part? You can craft a batch in the fall and enjoy them throughout the winter.
Three Patterns, Endless Possibilities
The project offers three distinct patterns, each with precise piece counts for easy replication. The key rule is simple: lay out all pieces dry before gluing. This ensures a polished final product. For instance, the six-armed snowflake requires 6 wheels, 18 penne, and 6 shells, while the eight-armed star needs 9 wheels, 8 shells, and 8 fusilli. The snowflake with twisted arms uses 1 wheel, 6 shells, 12 fusilli, and 6 elbows, showcasing the variety of designs achievable with these simple materials.
The required pasta shapes—wagon wheels, penne, shells, fusilli, and elbows—are readily available at Walmart or Target for $8 to $12 per box. Store brands work just as well as pricier imports, making this project both accessible and affordable.
Crafting the Perfect Snowflake
Start by sorting pasta for even size, especially the wheels, as inconsistencies become noticeable after painting. For curved tips, select elbows with bends that match the pattern. If kids are helping, they can count pieces and arrange patterns, while adults handle the glue gun and spray paint. This collaborative approach makes the project fun for all ages.
The six-armed snowflake features a ring of six wheels with penne arms and shell caps. The eight-armed star uses a central wheel surrounded by shells and outer wheels tipped with fusilli. Each pattern is meticulously detailed, ensuring a professional finish.
Read Also: Pizza Pumpkins: Creative Halloween Treats with Simple Ingredients
The process is straightforward: lay out the pieces, glue them together, and apply several thin coats of spray paint outdoors. Once dry, attach a hanger, and your snowflake is ready to display. This method ensures durability and a smooth finish.
Gluing and Painting Techniques
Before gluing, photograph the layout for reference. Start by gluing the center, placing small dots of hot glue at contact points and letting each joint cool. Assemble individual arms first, then attach them to the center, keeping pasta flat against the mat. This step-by-step approach ensures structural integrity.
Carefully pick off cooled glue strings before painting. Once dry, flip and paint the back. Let the paint cure completely before attaching a hanger. This attention to detail guarantees a professional finish.
Styling and Storage Tips
For styling, group snowflakes with a limited color palette, echoing it in surrounding decor. On a tray, you can stand one ornament upright between LED candles with a small hidden stand supporting it from behind. Put pinecones and evergreen sprigs behind it, and scatter smooth stones in dove blue to pale gray in front. The stand should carry the ornament without pressing on any single piece of pasta. Test the whole arrangement before you move the tray.
Hang three different snowflakes on bare branches in a ceramic vase. A light wood dresser, cream linen, and a dove-blue bowl of pinecones are all the company they need. Against a quiet gray-beige wall, the white patterns stay crisp and readable. In a window, hang several ornaments on threads of different lengths. White, pale blue, and dove gray together make an understated garland. Leave real space between the motifs, crowded, they turn into noise.
On the dining table, run the snowflakes in a zigzag between votives and small jars of frosted pinecones. Use LED lights; real candles stay unlit in this arrangement, since dry pasta and open flame are a bad pairing. Store the fragile pieces dry and padded individually, a shoebox with crumpled tissue between layers does the job, and basements with damp winters are the one place they won’t survive until next year.


