
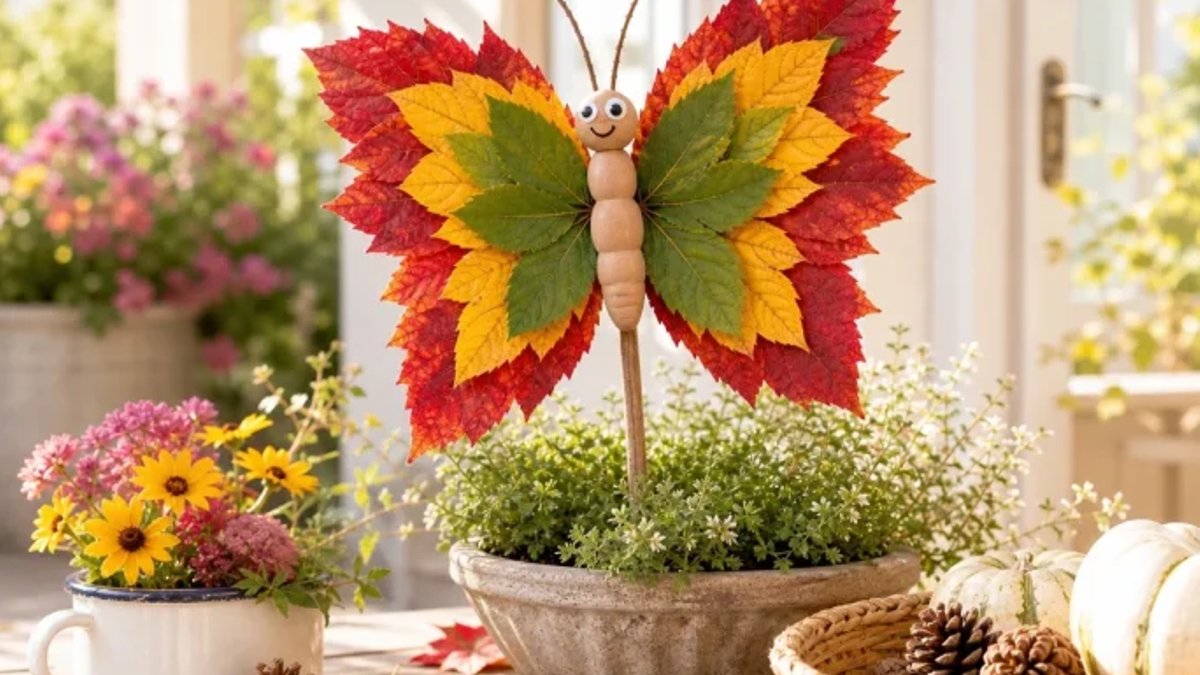
Fall butterflies made from real leaves are the simplest way to bring autumn indoors—no glue, no mess, and no cost beyond what’s already on the sidewalk. The project turns piles of red, gold, and green foliage into delicate, layered wings that catch light like real insect scales, all held together with double-sided tape and a scrap of cardboard. Unlike store-bought decorations, these butterflies last just long enough to feel seasonal, then fade—or can be easily refreshed with new leaves as the weather shifts.
Choosing the Right Leaves
The key to success lies in the leaves themselves. Freshly fallen maple, sweetgum, or red oak hold their color best, while thin birch leaves curl fastest. Leaves that have dried out crack when pressed, so gather them within a day or two of hitting the ground. When the veins are still moist, the natural sheen catches ambient light, giving each wing a subtle sparkle reminiscent of real insect scales. The craft requires almost nothing: a piece of cardboard, double-sided tape, modeling clay for the body, and a few twigs for antennae.
Read Also: Salon Gloss Restores Shine to Seniors’ Gray Hair
No liquid glue is needed, the tape sticks leaves firmly without warping the cardboard, and the result looks almost hand-painted. Cardboard can be reclaimed from any thin corrugated sheet, such as a cereal box or a shipping container, and it provides a sturdy base for the wings. By using tape, the delicate veins of the foliage stay intact, allowing the colors to remain vivid throughout the display period.
Layering Leaves to Form Wings
A single butterfly starts with a cardboard cutout. Draw a broad, rounded shape for the upper wings and a tapered lower edge, then cover the front entirely with overlapping strips of double-sided tape. Peel off the backing and begin layering leaves: start with deep red or brown along the outer edges, then overlap with green and yellow toward the center. The overlapping creates a three-dimensional effect, mimicking how real butterfly wings catch light. Perfect symmetry isn’t the goal, small imperfections make the finished piece look organic.
For the body, roll a small head and segmented abdomen from modeling clay, then attach two thin twigs as antennae. The clay, being pliable, allows the creator to shape realistic segments, and once it dries, it holds its form securely. Add googly eyes or draw them with a marker before letting the clay cure. Once dry, glue the body to the center of the wings with a craft adhesive. The entire process takes under an hour, and the materials cost next to nothing, most supplies can be scavenged from shipping boxes, drawers, or the yard.
Read Also: Dried Hydrangeas Create Subtle Grave Cross Tribute
Creative Ways to Display Butterflies
Placement matters just as much as the crafting. These butterflies work best in natural settings: tucked into a houseplant as a seasonal pick, mounted on a wooden dowel in a fall centerpiece, or arranged with pinecones and moss on a coffee table. Their bright colors stand out against deep green foliage or muted wood tones, but they look out of place next to polished decor. A butterfly in a pothos pot instantly makes the plant feel autumnal, while one propped on a twig in a table arrangement draws the eye without overwhelming the space. When positioned near a window that receives soft afternoon light, the butterflies cast gentle shadows that enhance the three-dimensional illusion.
The first step is the simplest: look down the next time you walk past a pile of leaves. The best supplies of the year are already there, waiting to be transformed into a fleeting work of seasonal art.


